Step-by-Step Guide: How to Dry Cannabis Leaves for Tea
Cannabis leaf tea has gained significant attention for its potential wellness benefits. Many enthusiasts are turning to this natural remedy as part of their holistic health routines. To ensure the best experience, proper drying techniques are essential.
Harvesting at the right time is crucial for preserving the plant’s cannabinoids and flavors. Whether you’re a seasoned cultivator or a beginner, understanding the drying process can make a big difference. This guide covers three primary methods: air-drying, dehydrators, and silica packs.
Safety and compliance with local regulations are also key. Always ensure you’re following the laws in your area. By focusing on selection, preparation, and storage, you can create a high-quality product that meets your needs.
Real-world applications, like those from cultivator Rebecca Ryan, show how effective these methods can be. Stay tuned for a detailed breakdown of each step to elevate your tea-making experience.
Preparing Cannabis Leaves for Drying
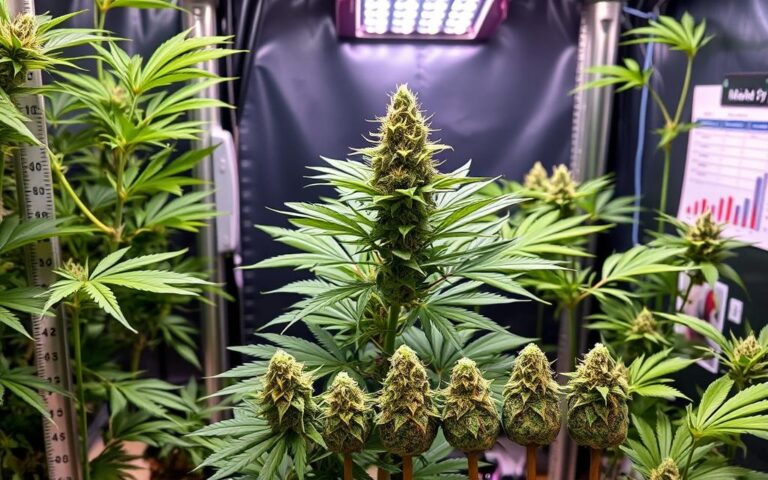
Mature fan leaves are the foundation of a rich and aromatic tea blend. These larger leaves contain higher concentrations of cannabinoids and terpenes, making them ideal for infusion. In contrast, sugar leaves, while usable, often lack the same potency and flavor profile.
Choosing the Right Leaves: Fan Leaves vs. Trim
When selecting material for tea, prioritize mature fan leaves with five or more blades. These leaves are harvested during the late flowering phase, when trichomes are milky with some amber. This timing ensures maximum CBD content and a robust flavor.
Related Posts:


Using damaged or pest-affected plant material is not recommended. Such leaves may compromise the quality and safety of your tea. Always inspect your harvest carefully before proceeding.
Cleaning and Prepping Your Cannabis Material
Cleaning is a critical step to remove dirt and impurities. Start with a three-step rinse cycle using cold water. Submerge the leaves to loosen debris, gently agitate them, and rinse under running water. This process ensures your material is clean and safe for consumption.
After cleaning, pat the leaves dry with a microfiber cloth to manage moisture. Excess water can lead to mold during the drying process, so this step is essential. Proper moisture control preserves the quality of your leaves.
Two common preparation methods are water curing and dry curing. Water curing removes water-soluble compounds, resulting in a smoother taste. Dry curing, on the other hand, preserves the full spectrum of cannabinoids and terpenes, enhancing flavor and potency.
For example, a 6-foot plant can yield approximately 1.5 freezer bags of leaves. This ratio helps you estimate the amount of material you’ll need for your tea preparation.
How to Dry Cannabis Leaves for Tea?
Drying methods play a crucial role in preserving the quality of plant material. Proper techniques ensure the integrity of cannabinoids and terpenes, enhancing the flavor and potency of your tea. Below, we explore three effective methods: air-drying, using a dehydrator, and silica packs.
Air-Drying: Traditional and Low-Tech
Air-drying is a classic approach that requires minimal equipment. Spread the material in a cool, dark area with consistent airflow. Ideal conditions include a temperature of 60°F and 60% relative humidity. This method typically takes 4-7 days, depending on the environment.
Place a fan in the room to improve airflow and prevent mold. Avoid direct sunlight, as it can degrade cannabinoids. This low-tech method is perfect for those who prefer a natural drying process.

Using a Dehydrator for Faster Results
For quicker drying, a dehydrator is an excellent choice. Set the temperature between 115-125°F to preserve terpenes. Models like the Excalibur 9-tray dehydrator are ideal for bulk processing.
Arrange the leaves evenly on the trays to ensure consistent drying. This method reduces drying time to around 18 hours, making it a convenient option for those with limited time.
Silica Packs for Controlled Moisture Removal
Silica gel packets offer a controlled way to remove moisture. Place the material in an airtight container with silica packs for 48 hours. This method is safe and prevents chemical transfer, ensuring the quality of your leaves.
Compared to air-drying, silica packs significantly reduce drying time while maintaining the integrity of the plant material. This approach is ideal for those seeking precision and efficiency.
Each method has its advantages, so choose the one that best fits your needs. For more details on drying techniques, check out this comprehensive guide.
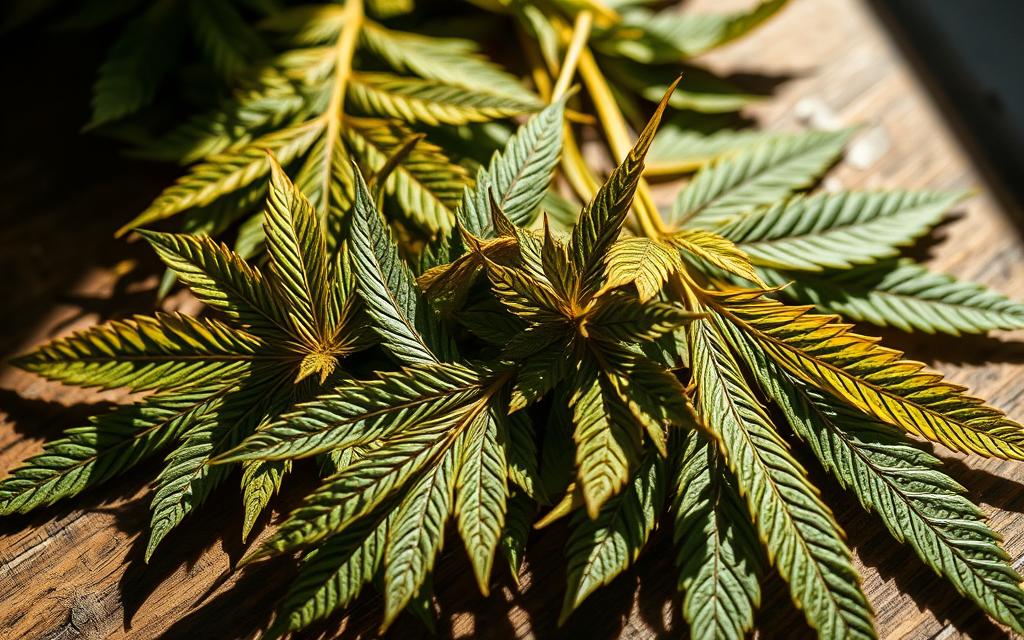
Monitoring Dryness and Testing Readiness
Ensuring the right level of dryness is critical for preserving the quality of your material. Proper monitoring helps avoid issues like mold or over-drying, which can ruin your preparation. Testing for readiness involves a combination of visual and tactile checks.
Signs Your Leaves Are Properly Dried
One of the most reliable tests is the snap test. Gently bend a stem; if it breaks cleanly without bending, your material is ready. If it bends, it needs more time. Another method is using a moisture meter, which should read between 8-12% for optimal results.
Visual cues are also important. Properly dried leaves transition from a vibrant green to an olive drab color. This change indicates the completion of the process. Always inspect for mold, which appears as white fuzz or dark spots, as it can compromise safety.
Avoiding Over-Drying or Trapped Moisture
Over-drying can lead to brittle material that loses its potency. If this happens, rehydration is possible. Place the leaves in a sealed container with a damp cloth for a few hours to restore moisture. However, trapped moisture is a bigger risk, as it can cause mold.
To prevent this, burp your storage containers during the first 72 hours. Open them briefly to release excess humidity. This simple step ensures your material stays fresh and safe for use.
“Proper drying is the bridge between cultivation and preparation. It’s where quality is either preserved or lost.”
| Issue | Solution |
|---|---|
| Over-drying | Rehydrate with a damp cloth in a sealed container |
| Trapped moisture | Burp containers during the first 72 hours |
| Mold growth | Inspect visually and discard affected material |
By following these steps, you can ensure your material is perfectly dried and ready for use. This process enhances the overall experience and guarantees the best results for your preparation.
Storing Dried Cannabis Leaves for Tea
Proper storage ensures your dried leaves retain their potency and flavor for months. Choosing the right containers and techniques can make all the difference in preserving their quality. Whether you’re preparing for long-term storage or immediate use, these tips will help you maintain freshness.
Best Containers for Long-Term Freshness
Mason jars and vacuum-sealed freezer bags are ideal for storing dried leaves. Mason jars are airtight and protect against light, while freezer bags save space and prevent air exposure. Both options keep your material fresh and ready for use.
For added protection, place humidity packs inside the containers. These packs maintain 62% relative humidity, preserving the natural flavors and preventing mold. Store your containers in a cool, dark place to maximize shelf life, which can last 12-18 months.

Grinding Leaves into Tea-Ready Powder
Grinding the leaves into a fine powder enhances your tea experience. A coffee grinder works quickly for large batches, while a mortar and pestle offers more control for smaller quantities. Both methods ensure a consistent texture for brewing.
Once ground, store the powder in UV-blocking containers with desiccants. This setup protects against light and moisture, keeping the powder fresh. For brewing, use one teaspoon of powder per 8 ounces of boiling water for a balanced flavor.
Experiment with blending mint or chamomile for added aroma and taste. These combinations can elevate your tea, creating a unique and enjoyable experience. For more tips on using leftovers from your harvest, check out this guide.
Conclusion
The journey from harvest to brew is both art and science. From selecting the right material to mastering drying techniques, each step shapes the final experience. Proper temperature control ensures the flavors remain vibrant and the leaves retain their potency.
Experiment with different drying durations to find what works best for you. Many users, like Rebecca Ryan, report therapeutic benefits from their preparations. Always calculate dosages carefully to ensure safety.
For those looking to explore further, consider creating topical salves from leftover material. Share your personal drying stories to inspire others. Every effort contributes to a richer, more enjoyable process.
FAQ
What’s the difference between fan leaves and trim for tea?
Fan leaves are larger and contain fewer cannabinoids, while trim includes smaller sugar leaves with more resin. Both work, but trim often provides stronger flavors.
How do I clean cannabis material before drying?
Gently rinse the leaves under cool water to remove dirt or debris. Pat them dry with a clean towel to avoid excess moisture.
Can I use a dehydrator for faster drying?
Yes, a dehydrator speeds up the process. Set it to a low temperature (around 95°F) to preserve the flavors and prevent over-drying.
How do I know when the leaves are fully dried?
Properly dried leaves will feel crisp and crumble easily. Avoid over-drying, as it can diminish the aroma and potency.
What’s the best way to store dried leaves for tea?
Use airtight containers like glass jars or vacuum-sealed bags. Store them in a cool, dark place to maintain freshness.
Should I grind the leaves into powder before brewing tea?
Grinding the leaves into a fine powder enhances infusion, allowing for a richer and more consistent flavor in your tea.
Can I use silica packs to remove moisture?
Yes, silica packs help control humidity during storage, ensuring the leaves stay dry and free from mold.
How long does the drying process take?
Air-drying typically takes 3-7 days, while a dehydrator can reduce the time to 6-12 hours, depending on the moisture content.